


How to grade bikepacking route difficulty?
One of the most challenging aspects of posting routes that I, and members of the bikepacking community, have created, is deciding on the level of difficulty.
As a starting point, I spent some time searching online for various means of assessing route difficulty. The best resource I have found to date, is the Route Rating Scale by Bikepacking Roots, which can be found with the routes on their website. For simplicity sake, as well as hopefully establishing a standard that is both accurate and manageable, I have decided to incorporate the Bikepacking Roots Rating Scale into Bikepack Adventures.
Route Rating Scale
Physical difficulty
- 1-2 – Relatively level riding
- 3-4 – Regular rolling terrain with sustained climbing
- 5-6 – Rugged terrain with frequent climbs, some of which may be steep and unrelenting
- 7-8 – Very rugged terrain with abundant climbing, some of which is very steep and unrideable
- 9-10 – Numerous very steep, climbs requiring bike-pushing and/or carrying
Technical difficulty
- 1-2 – Smooth riding surface with few obstacles (e.g., graded dirt roads, rail trails); suitable for novice mountain bikers
- 3-4 – Track has occasional obstacles and steep sections (e.g., maintained forest roads, mellow singletrack); suitable for beginner mountain bikers
- 5-6 – Continuous sections of track may be rocky, loose, and steep; (e.g., 4×4 roads or singletrack in rugged/rocky terrain) suitable for intermediate mountain bikers
- 7-8 – Narrow trail with regular obstacles, sustained steep grades; suitable for intermediate to advanced mountain bikers
- 9-10 – Very challenging riding with frequent large obstacles, exposure, very steep grades; suitable for advanced mountain bikers
Breaking it all down
I like the way Bikepacking Roots has broken down these two elements. While I do find that quite often physical difficulty as a correlation to technical difficulty, there are times when it is important to distinguish between the two. Let’s dive in with a few examples from my time bikepacking around Ontario and Quebec.
Example #1
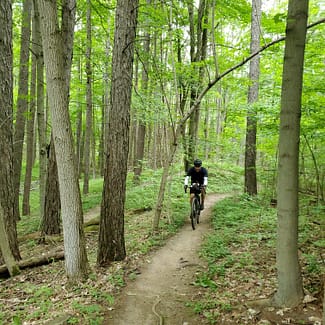
In this situation I was riding on relatively flat land in a small conservation area in Ontario, filled with beautiful flowy singletrack. Although from a physical point of view it was easy riding, and could be described as a level 1-2 difficulty, the technical difficulty would have been a 3-4 (mellow singletrack).
Example #2
While on another bikepacking adventure, I was riding a section of unmaintained gravel road strewn with first-sized rocks and plenty of ruts made from water run-off. While physically, it could be considered regular rolling terrain with sustained climbing, providing a physical difficulty of 3-4, the skill needed to climb the hills and avoid the large stones and descend while avoiding the ruts gives the route a technical difficulty of 5-6.
Challenges
There are various challenges to assessing both the physical and technical aspects of a route. In order to come to terms with the challenges that present themselves, I’ve decided to break it down as best as possible.

Consideration #1: Distance
It’s clear to even the most basic bikepacker out there that there is a huge difference between a 100km route and a 1000km route. There can be no doubt. However, in the difficulty scale, there is no indicator for distance. And there is a good reason for this. In general, I consider a day of riding as being between 80km and 120km for the average rider. I imagine that by the next morning you are ready to rock and roll and have recovered sufficiently for the day ahead. Of course, the more difficult the average of the route, the more wear and tear there will be on your body and the more the multi-day impact will be noticeable..
Consideration #2: Variations in terrain
I think the single biggest challenge in trying to rate a bikepacking route for difficulty is coming to terms with the varying types of terrain that are found throughout a longer route. The more types of terrain and the bigger the changes in the landscape, be it rail-trail, flowy singletrack, unmaintained roads, etc. the more difficult it becomes to put a number into the technical difficulty category. Even if 80% of a route is easy rolling gravel roads with a physical difficulty of 3-4, but the other 20% is made up of rugged singletrack, hike-a-bike and steep challenging descents, with a physical difficulty of 7-8 and even up to a 9 or 10, it would be remiss to determine the physical difficulty of the route as a 4, when in fact, 20% of really challenging trail would need to be taken into consideration. Keeping this in mind I would most likely grade the physical difficulty of the route as having an average of 6 or 7. This would take all the various factors into consideration. Obviously, this isn’t perfect, but I believe for the most part it does a sufficient job. Variations in terrain affects all aspects of rating a route, as it impacts both the physical and the technical difficulty of a route.
Consideration #3: Contributor
The last consideration I need to take into account is the amount of detail provided by the creator or contributor of the route. I do my best to get a sense of the route by looking through their pictures and thoroughly reading their descriptions of the routes. However, sometimes it’s very difficult and it is a bit of guesswork. I’m quite confident in the difficulty ratings of routes I have ridden, so as I ride more routes throughout the region I will be able to continually update the ratings.
Conclusions
All-in-all, I hope this article gives everyone a good sense of the thought process that has gone into assessing the difficulty of bikepacking routes. This is meant to be a working document, and will be improved and updated when necessity dictates. If you have any feedback or issues I should take into consideration, please comment below, email me at chris@bikepackadventures.ca or send me a message over Instagram or Facebook.
In the meantime.
Keep on pedalling